Brace both ends of the line
The whole game is a single sketch per round: you draw one barrier, let go, and the scene's physics decide whether it holds. The outcome turns on where you place the line and how its ends make contact with the world.
One drawn barrier decides whether the round holds
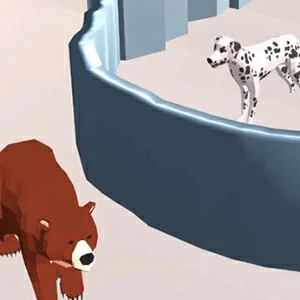
Keep a barrier standing in the gap that separates the dog from the hazard for the whole round. The level ends when the drawn line holds and the dog stays clear of whatever it was drawn against, so one steady shape is the entire job.
Hold the mouse button and drag to sketch the barrier on desktop, or use one finger to trace it on a touch screen. Releasing the drawing submits it, and from that moment the scene's physics take over and settle the line into its real position.
Look at the scene before drawing: note which side the hazard will arrive from and check which surfaces can hold a line. Sketch one short barrier on the exposed side, anchored at both ends, then release it and watch how it settles.
Brace both ends of the line before lifting your finger
An endpoint that stops in mid-air lets the whole barrier slide or tip when the hazard hits. End the stroke on the ground, a wall, or another fixed surface so the shape stays put. The same idea holds far longer when every open part of the line rests on something solid.
Trace the side the hazard is coming from
The dog only needs a shield on the side the threat uses. A wide ring around the whole scene wastes the line and leaves long unsupported stretches that physics loves to move. Match the shape to the threat's direction and keep it as short as it can be, since a tight wall is easier to hold steady.
Judge the drawing after it has settled
The line keeps moving once the level starts, so what you sketched is not where it ends up. Let the barrier settle fully and check where it ends up before deciding anything. The useful shape is the one that stays after the physics act, not the one you first intended.
Shorten the stroke when a wall tips over
When a barrier fails, redrawing it with longer strokes usually makes it weaker. Shorten the line, keep it close to the dog, and brace both ends against solid surfaces. A compact shape survives far better than an ambitious loop, so start small and test the result before extending it.
Patch the exact edge the threat slipped past
If the dog gets hit, look at where the hazard broke through instead of redrawing the whole barrier. Extend that one end a little beyond the line the threat travels, or anchor it against a new surface, then retest the same approach. A single closed gap restores the round faster than a fresh shape.
The YOU LOST! readout closes the round
When the hazard reaches the dog, the screen shows YOU LOST! and the round ends there. That message is your cue to treat the run as over and move to the patch step rather than watching the scene. Each failed pass supplies one useful fact: the edge that still needs closing.
Keeping the drawn barrier standing
Why does my drawn barrier fall over during the round?
Because one of its ends was left unsupported. When the physics start, any section of the line floating in open space tends to slide or tip, and the whole shape follows. End both sides of the drawing on a solid surface and the same barrier will hold far longer.
Does the shield need to wrap the whole dog?
No. Only the side the hazard approaches from needs protection, and a tight wall there clears the round. A full ring adds long unsupported stretches that can swing or tear open once the physics settle, which is a more fragile design, not a safer one.
What does the YOU LOST! screen tell me?
It appears the moment the hazard reaches the dog, ending the round. Treat it as the finish line of a failed pass: look at the edge the threat broke through, extend or re-anchor that end, and retry the same idea instead of sketching a bigger barrier elsewhere.
Where is a good place to stop between rounds?
The cleanest stop is right after a barrier settles and you have seen whether it holds. That is the moment the drawing decision is complete and the result is banked. Walking away mid-draw leaves the level waiting on a sketch you have not finished judging.